And there you have it. It’s just that easy…
But let’s back up a little bit.
This all started quite a while ago. Having just finished a second Nicholson bench that I finally decided to add a toothed plane stop, and quickly discovered that it is by far better than any plane stop I’d ever seen or used before.
It got me thinking. Nay wondering about all the things I might be able to do that I’d found rather tricky with my old plane stops.
It started out as just a leg. How could you make an octagon leg look a little more distinctive?
Distinctive yes, but rounding consistently on 8 sides and then mirroring it again on the other side is tough, and the octagon really shows inconsistencies!
Still tricky, but if you pare in straight lines, it’s a lot easier, although at this point, it was clear I needed a lot more practice at a skill that can be a little tedious. I think it was around this time that the idea of actually making a camp stool had come to life.
Having completed this foot I’d pretty much given up on perfection, and decided to move onto production, but thankfully through some gentle critique of people I respect, I was reminded that I should expect better from myself.
Later that night, I tweaked that last leg a little and felt a bit better about it. That was the boost I needed. It wasn’t there, and frankly “there” is probably beyond my reach, but it was an improvement.
Over the next couple of days I got a new design in my mind, I wasn’t overly hopeful about it, but I figured I’d give it a try.
I got a little distracted on the bottom trying some other late idea, but I liked the original idea. It’s good to feel good about a design. It’s not perfect, but for a guy that does not excel at design, we’re going to call this a win!
Next problem… This sweet Lee Valley hardware was designed for a round leg.
A lathe makes all this easy, but this had become an exposé against our dependency on lathes in woodworking. Careful chisel work made for a nicely rounded area on three points, but not affecting the forth. Take that Lathes!!!
With a wee bit of confidence under my belt, it was time to dip into the project wood.
Side note. I guess you could say that’s kinda like some live edge slab, and no epoxy in site!
Obligatory gratuitous walnut end grain shaving shot…
I cut the blanks over size so I could cut them to size minimizing the grain run out.
It had been a while since I’d worked with walnut. What a great wood!
Remember the plane stop? It makes this simple jig work amazingly.
So here is the most difficult part of making these legs. Getting the first side right sets the whole leg up. When you want three legs the same, you want to get this step done on all three so you can ensure that they all match.
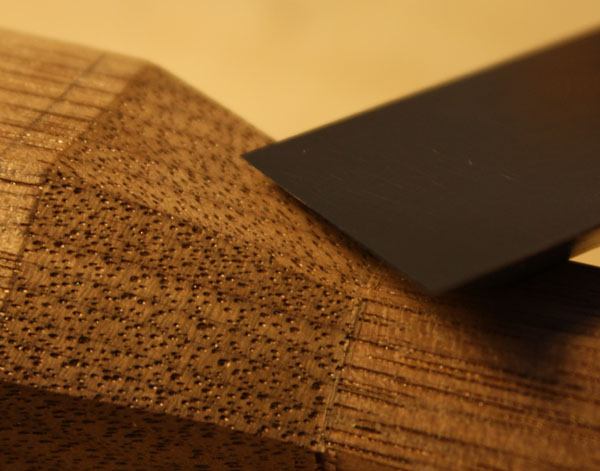
Obligatory gratuitous grain closeup shot…
The process is a long one. It’s faster to do as much as you can with a chisel, but at some point you need to incorporate a plane to flatten things out.
Not flat…
What a happy day it was when this most technical and painstakingly difficult step was done.
So what happens when you don’t own a drill press?
You find a way.
We don’t need no stinking drill press.
My reward for some drilling well done was some easy paring to finish the feet.
Pixie Feet.
The basics of the leather work is pretty simple. Make a template.
Cut it out. One thing I learned too late was, cut with the knife 90 degrees to the template. Don’t tilt. You’ll understand the first time you try it.
There are templates for all this stuff if you take the time to search them out. I decided to just figure it out for myself. My one tip for this is that I think I’d have preferred the holes a little further from the edge. That way I would have had a little more material to trim the edges flush. Again, I’m sure you will see what I mean on your first try.
Dyeing the leather was pretty uneventful. This was my practice piece.
The rivets weren’t too bad either. The rivet setter had a burr rounder, but it was so rough I decided to try my hand at peening them by hand. Having a nicely polished hammer head makes for a cleaner finished product. More practice would make for a better finished product.
I used my card scraper burnisher to burnish the edges. Not the right tool, but it did ok.
Finished.
It even passed the stress test.
If you’ve ever thought about making one of these you should. With a simple octagon leg you could bang one out in a day or two if you are a fast worker. This whole process however, along with all the practice pieces, was more like 4 months.
