Fair Woodworking

April 22, 2018

Lathe Free or Die. The Making of a Folding Camp Stool.

Filed under: Favorites,Skill development,Things I've made — fairwoodworking @ 8:05 pm

And there you have it. It’s just that easy…

But let’s back up a little bit.

This all started quite a while ago. Having just finished a second Nicholson bench that I finally decided to add a toothed plane stop, and quickly discovered that it is by far better than any plane stop I’d ever seen or used before.

It got me thinking. Nay wondering about all the things I might be able to do that I’d found rather tricky with my old plane stops.

It started out as just a leg. How could you make an octagon leg look a little more distinctive?

Distinctive yes, but rounding consistently on 8 sides and then mirroring it again on the other side is tough, and the octagon really shows inconsistencies!

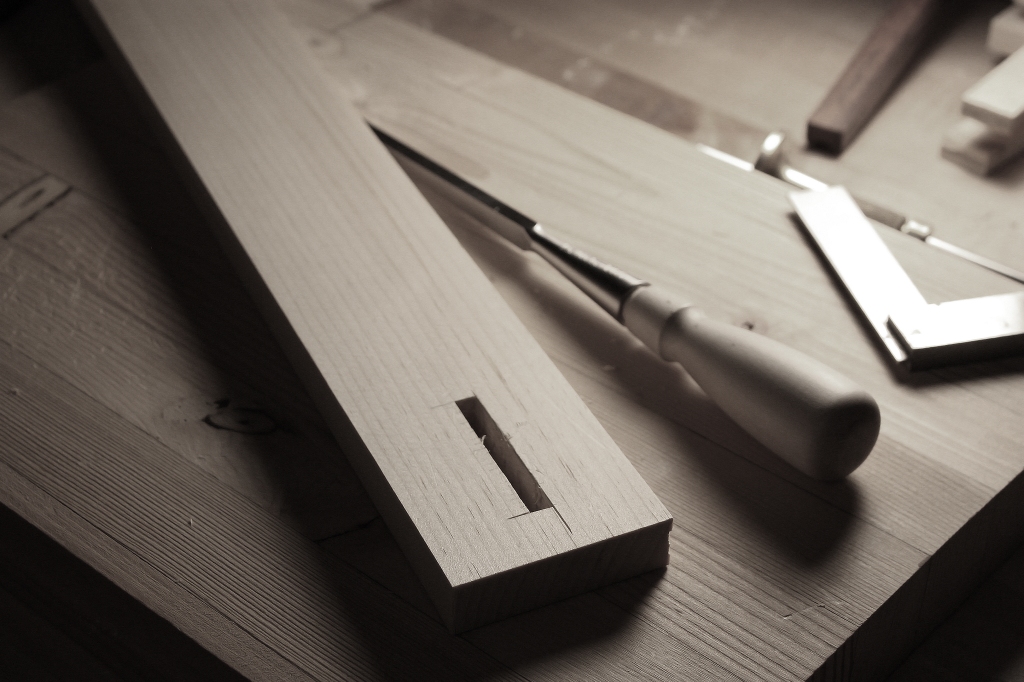
Still tricky, but if you pare in straight lines, it’s a lot easier, although at this point, it was clear I needed a lot more practice at a skill that can be a little tedious. I think it was around this time that the idea of actually making a camp stool had come to life.

Having completed this foot I’d pretty much given up on perfection, and decided to move onto production, but thankfully through some gentle critique of people I respect, I was reminded that I should expect better from myself.

Later that night, I tweaked that last leg a little and felt a bit better about it. That was the boost I needed. It wasn’t there, and frankly “there” is probably beyond my reach, but it was an improvement.

Over the next couple of days I got a new design in my mind, I wasn’t overly hopeful about it, but I figured I’d give it a try.

I got a little distracted on the bottom trying some other late idea, but I liked the original idea. It’s good to feel good about a design. It’s not perfect, but for a guy that does not excel at design, we’re going to call this a win!

Next problem…  This sweet Lee Valley hardware was designed for a round leg.

A lathe makes all this easy, but this had become an exposé against our dependency on lathes in woodworking. Careful chisel work made for a nicely rounded area on three points, but not affecting the forth. Take that Lathes!!!

With a wee bit of confidence under my belt, it was time to dip into the project wood.

Side note. I guess you could say that’s kinda like some live edge slab, and no epoxy in site!

Obligatory gratuitous walnut end grain shaving shot…

I cut the blanks over size so I could cut them to size minimizing the grain run out.

It had been a while since I’d worked with walnut. What a great wood!

Remember the plane stop? It makes this simple jig work amazingly.

So here is the most difficult part of making these legs. Getting the first side right sets the whole leg up. When you want three legs the same, you want to get this step done on all three so you can ensure that they all match.

Obligatory gratuitous grain closeup shot…

The process is a long one. It’s faster to do as much as you can with a chisel, but at some point you need to incorporate a plane to flatten things out.

Not flat…

What a happy day it was when this most technical and painstakingly difficult step was done.

So what happens when you don’t own a drill press?

You find a way.

We don’t need no stinking drill press.

My reward for some drilling well done was some easy paring to finish the feet.

Pixie Feet.

The basics of the leather work is pretty simple. Make a template.

Cut it out. One thing I learned too late was, cut with the knife 90 degrees to the template. Don’t tilt. You’ll understand the first time you try it.

There are templates for all this stuff if you take the time to search them out. I decided to just figure it out for myself. My one tip for this is that I think I’d have preferred the holes a little further from the edge. That way I would have had a little more material to trim the edges flush. Again, I’m sure you will see what I mean on your first try.

Dyeing the leather was pretty uneventful. This was my practice piece.

The rivets weren’t too bad either. The rivet setter had a burr rounder, but it was so rough I decided to try my hand at peening them by hand. Having a nicely polished hammer head makes for a cleaner finished product. More practice would make for a better finished product.

I used my card scraper burnisher to burnish the edges. Not the right tool, but it did ok.

Finished.


It even passed the stress test.

If you’ve ever thought about making one of these you should. With a simple octagon leg you could bang one out in a day or two if you are a fast worker. This whole process however, along with all the practice pieces, was more like 4 months.

#LatheFreeOrDie


May 13, 2017

How to Break in a Binding. According to My Dad. I Think.

Filed under: Fair Woodworking & Hand Tool Blog,Favorites — fairwoodworking @ 6:54 pm

When I was a teenager, my Dad sat me down for “The Talk”.

He said, “Son. You can tell a lot about a person by how they treat their books”.

What “talk” were you thinking about?

Like my Dad, I’m not a skilled reader, and as a High School drop-out, I am the better educated of the two of us. Despite our inability to cope with the classroom, both of us in our own time have learned the value of a well written, and/or well made book.

We don’t use books as coasters, and we don’t fold the corners of pages to mark our place. That’s what book marks are for. Writing thoughtful comments on the pages was acceptable, but since my hand writing is worse that my reading, I abstain.

Part of our “talk” was a demonstration of how to break in a new book. A book is only as strong and the binding, and it’s a sad thing when it splits. I don’t remember where my Dad learned this, and I’ll admit I was only half listening. Heck, some of you who know more may not believe it’s even necessary, but if for nothing else, it’s a great way to say hello to a new friend.

Editors note 05/14/17 – It’s been brought to my attention, that a noted Journalist by the name of Christopher Schwarz addressed a similar topic a number of years ago. It is quite possible that my method is just a heavily watered down version of the same technique.

November 17, 2014

You Aren’t Sweeping Enough (And I’m not, Either)

Filed under: Favorite tools,Favorites,I Think I'm Funny — fairwoodworking @ 5:43 pm

IMG_8910

If a students shows me the floor during class and asks: “Should I s….”

I cut them off. “Yes.”

I have found that when you ask yourself if your floor is dirty, the poor pathetic thing is way past being dirty and is on its way to getting covered with trash. I think you need to sweep a floor before it actually occurs to you to sweep that floor. Sounds impossible, but it’s not.

I sweep a lot, and it is part of the rhythm of my day. As I finishing planing up panels with a jointer plane, I stop to sweep the floor before I take on the parts for the lid – even if the floor is performing well.

When I chop dovetails, I touch up the floor between each corner of a carcase – even if the floor is clean and doing well.

This is the opposite of the way I was taught to evaluate floors. I was told: “The surface of the floor will tell you how your floor is performing. If the floor looks bad, it’s time to sweep.”

While that makes sense on one level, I don’t want the floor to ever look bruised or scraped or chunked out. So I sweep the floor several times a day.

This approach not only ensures my floors will look their best, it also removes most concerns about what material your floor is made of. If you keep a floor wicked clean(and nothing less) then it really doesn’t matter if a wood floor stays clean longer than concrete.

So shut up and sweep.

IMG_8916

Editors note – Some of you may be thinking this is quite possibly the dumbest thing I’ve ever written, and you people are what I like to call “wrong”. The above post is actually a near direct ripoff of a recent post over at Lost Art Press. The idea made me laugh more than any sane person should laugh about their own joke, but that is just how I roll.

Deal with it.

The truth is I was getting ready to talk about ultra sexy topic of sweeping anyways, and the above “upright dust pan” is a real thing of beauty.

Having now moved into my ultra tiny work shop, there is really no spare floor space that you can push sawdust and shavings out of the way, and so as dumb as the this post may sound, I really do “sweep a lot, and it is part of the rhythm of my day”, but it’s not so bad if I’m not down on my knees when I’m doing it.


So shut up and sweep.

October 22, 2014

Easy Woodworking Projects for Christmas

Filed under: Christmas Gifts,Fair Woodworking & Hand Tool Blog,Favorites — fairwoodworking @ 9:04 pm

It’s way, WAY too early to be thinking about Christmas gifts (that’s what Christmas Eve is for), but as it would happen. I ran into a couple of people today that had big plans for Christmas woodworking.

The funny thing was, that none of them were woodworkers.

So what is the ideal NonWoodworker Easy project?

Well, picture frames obviously!

I mean hey!? What other woodworking project needs just 4 pieces of wood, and 4 simple mitres to put them together?

It’s so easy that it hardly counts as woodworking…

So now that I have the chance to talk behind the backs of these nonwoodworking people, let me say this.

Every woodworker has had this very same thought before they tried making a picture frame. They all thought it would be easy. Most of them had no idea that their tools were nowhere near accurate enough to cut 4 perfect 45 degree miters.

And all of them gave their loved ones “Rustic” styled picture frames because there is no other way to hide the fourth miter that will hopelessly NEVER close up properly.


I wonder if rare earth magnets would help…

October 20, 2014

You don’t know what you don’t know until you know you don’t know it.

Filed under: Fair Woodworking & Hand Tool Blog,Favorites — fairwoodworking @ 11:00 pm

In the past week I had the pleasure of taking 2 classes with Vic Tesolin of Minimalist Woodworking fame.

I  should state, that I signed up for both classes with the clear knowledge that I knew everything that would be covered in the class, but since my new shop is still under construction, it would simply be a chance to woodwork. Also, being the social butterfly that I am, I’m also always game to hang out with other hand tool woodworkers.

What I knew for sure was that I wouldn’t learn anything.

What I didn’t know was that I didn’t know there were still things I didn’t know about both class topics.

Now however.

With my new found knowledge, I can dogmatically say that I have a truly exhaustive knowledge in two more woodworking subjects.

That is all.

July 21, 2014

Going Dutch on the Dutch Tool Chest

EDITORS NOTE *** This post is experiencing 3rd party photo hosting “issues”, that will be addressed as time allows. ***

Tool chests are stupid!

There.

I said it, and it feels good.

I literally don’t like tool chests, but I also don’t really like to brush my teeth. However, like having teeth, owning tools may require some things we don’t like. I also don’t like, no screw that! I HATE top lifting lids. What a stupid idea! If you have a 12″ deep chest, you lose at least 12 inches of valuable real estate directly above the chest. Then you have morons that do these sloping lids that turn 12 inches into 15 or more inches.

It’s a fool’s paradise.

Sooo… With such strong opinions about this topic, how did I get here? Well I’ve been designing the perfect tool chest/box/shelf/backpack for nearly 15 years now.

After my first day as a trim carpenter, I went to Walmart and bought the largest Rubbermaid container I could wrap my arms around to hold all my new tools. It was perfect because I was certain that I could fit all my tools in it, and I could make just one trip from the work site to my truck at the beginning, and end of the day. Once I carefully fit all my tools in that tub, I discovered that I couldn’t much more than drag the blasted thing.

It was frigging heavy.

The next day I’d replaced the big tub with two smaller tubs and a 5 gallon bucket. It took me 3 trips now, but there was no risk of needing surgery after lifting any of them.

When the world rediscovered the monstrous/traditional English Tool Chest, my first thought was that it had the same problem as Gigantor the Rubbermaid container. It’s not portable, well, not with a one man crew at least. I recently learned that the awesome size of these chests was intentional so thieves would have to team up to steal them, and since thieves are not great at sharing, they would often get caught.  Well my tools will stay safe by staying with me, so the ATC is dead in the water.

When I first got into hand tools, I tried making different styles of small tool cases that fit the tools I had at the time.

But then I’d buy a new tool and the case was suddenly too small.

In the past couple of years, the DTC has found overwhelming popularity. I immediately approved of its lower half, but despised the upper half due to its massive gaping top lifting lid. The lower shelves with the removable front face was perfect. However the DTC had become so trendy that I felt like spitting every time it was mentioned.

What the world doesn’t need is another “I made a Dutch Tool Chest” post, I thought.

Now If you just have a couple of shelves for a tool chest, you will have a great place to store your block planes, smoothers, a plow plane, and what have you. But at some point you will start looking for a home for, oh, I don’t know… Perhaps a jack plane or a jointer. Oh, look I own saws as well…

This shelf idea falls flat on its face with these tools.

So let’s soften our stance a little on this top lid idea a little. Sloping lids are stupid, but I could live with a simple flat-topped lid.

Hey, a tool rack to hold my chisels, and screwdrivers would be awfully nice on the back. Ya, that is a good part of this lidded chest idea.

Hmmm. My chisels are kind’a tall. This is going to be a rather deep chest if they are going to stand on end like this.  Well they fit so nicely there on the back, I think it will be worth it.

Hmmm. The front of this chest fits my longer planes really well, but with a flat-topped lid, there will be tons of space above the planes, and reaching over the high front is going to be awkward. It may be better if I lowered the front a little…

Ahhhh Crap! How did that lid get sloped?!?

Through years of struggle, I finally accepted that the Dutch Tool Chest despite it trendiness and idiotic sloping lid, was actually very well designed.

Well it’s at least half well designed.

It’s still a little too big and heavy.

I know people will argue this point, and say “what are you talking about? I can lift my DTC. You are just a wimp”

Well just being able to lift something does not make it portable. Being able to lift your chest off one stool and set it down on another stool does not make it portable either. It makes it moveable.

My shop is in the basement. To get to my truck I need to get the chest out of the shop, up the stairs, down the hall, out the door, down the stairs, and up the driveway. The large DTC, and even the smaller DTC are not especially portable in my opinion.

That’s why I decided to go Dutch.

If you haven’t noticed, this chest is really two chests stacked on top of each other, just like my two smaller Rubbermaid tubs. You may also notice that the top chest is a little wider than the lower one. I know this may bother some, but it’s for a reason.

The top one is 27″ wide so that it can fit saws on that darned sloping lid. The problem with that is many door openings in many houses are for 30″ doors. Most door openings also have a 1/2″ thick door stop on both sides of the jamb reducing the opening to 29″. A wide chest is a problem in a small doorway.

In the lower chest, most of the tools are stacked side by side. The longest tool in there is my framing square, and it is only 24″ long, so I was able to get away with just over 25″ wide. That makes it just possible to walk through most doorways with out scraping my knuckles.

But there is more.

Part of portability, is being able to bring as much of your workshop with you as possible. I built a simple stand that the chests sit on that also makes the top of the lower chest just the right height for free hand sharpening.

That’s right!

My tool chest is also a sharpening station.

How cool is that?

I’ve already talked about the sweet rope handles, so I’ll just let that alone except to say that the upper chest handles still need some tweaking, and have not had the ends trimmed yet. I’ll get to that… or I won’t.

And finally the gravity latches.

Once described as a “Cool locking system”, is not really that big of a deal. Almost every fence in the free world has a latch on its gate that utilizes gravity to make it latch. The idea was simple. Getting it to work in all levels of humidity was the real challenge, and resulted in the guts of it looking a little less “realwoodworker”ish than I would have preferred.

I’m still making friends with this whole tool chest idea, but I think I’ve come up with a chest that I might one day come to tolerate.

Editors note – It’s been over a year now. I’ve posted recently about how it has performed HERE.

May 18, 2014

1st Annual Day of the Jack Plane!

If you don’t know already. It’s been decreed, and I for one am all for it!

IMG_7950 copy

Now I know what many of you are thinking, I am just one of many mindless Schwarz’onian zombies, blindly following his every word.

I assure you I am not, and what better day to set the record straight than on Jack plane day?!

Way back in my early hand tool days, my original hand tool mentors on Hand Tool forums told me that scrub planes were the ultimate roughing tool, and I accepted this as gospel. Meanwhile, some scrawny journalist, that was actually building stuff with his tools, kept saying that scrub planes were more of a carpentry tool, and woodworkers were better off with the use of a Jack Plane. “What a dork”, I thought, because everybody knows that scrub planes are better.

Well a couple of years ago, on a whim, I finally bought a #5 jack plane. It sat on a shelf for months until one day I decided to see what all the fuss was about. I put one of my cambered blades into it, and tried it out as a roughing tool.

Wow…

I own a scrub plane. I can’t remember the last time I used it, and EVERY project I build gets dimensioned with hand planes. Chris was right, but was he really? He read somewhere that the jack plane was the better tool for the aplication. He tried it, and agreed with what he read. That doesn’t make him right, it makes him educated on a practical level.

So then he discovers the Moxton Vice, and I hated using that thing. He promotes the use of tool chests, and I said ya right I like my shelf. He is hard core on using sharpening jigs, and that drives me nuts! I personally think that until you are at the very least confident with sharpening by hand you need to avoid jigs. Why? Because god forbid your blessed jig gets damaged or lost and you are unable to sharpen anything until the UPS delivery guy knocks on your door with your replacement. The ability to sharpen tools is more important to hand tool woodworking than your ability to put on pants. Sorry Chris, I still think you are a little off on this one. Anyways, It’s funny how quick I am to disagree, with his “new” ideas, and also how often in practice they prove to simply be, time tested historically accurate gems of truth.

And,

Now he is telling us to “tooth” our bench tops!

What is this guy on?!!!

I have to admit, although it sounds nuts, I’d really love to give it a try some day. I have a sneaking suspicion I will like it, but I’ll stick with “it sounds crazy” until I do, because I have no hands on experience with toothed bench tops.

Bottom line is, don’t blindly preach what anyone else says. Gather as much information as you want, but test it before you preach it.

I think you will be surprised at how few big name woodworkers you will quote after the testing is done, and that is why I preach so much Schwarz’onian drivel.

October 14, 2013

You might be a woodworking sissy..

Filed under: Fair Woodworking & Hand Tool Blog,Favorites,I Think I'm Funny — fairwoodworking @ 4:53 pm

For starters,

If you take this post too seriously…

You might be a woodworking sissy..

If you are still using a sharpening jig,

You might be a woodworking sissy..

If you cut a V-groove before you make a saw cut,

IMG_8340

You might be a woodworking sissy..

If you’ve actually shed a tear after dropping a tool,

IMG_8342

You might be a woodworking sissy..

If you then posted about it on a woodworking forum hoping that Rob Lee would send you a new one,

You might be a woodworking sissy..

If you have ever criticized how someone else has cut dovetails  when you have never cut them yourself,

You might be a woodworking sissy..  Or one of many (but not all) overly well read, but under experienced woodworking forum members.

If you have ever made fun of the way others enjoy their woodworking hobby, for the sake of a blog post,

Untitled

You might be a woodworking sissy..

Guilty as charged.

Hope you are having a great Canadian Thanksgiving Monday.

June 24, 2013

Skill vs. Ability

Filed under: Favorites,I Think I'm Funny,Skill development — fairwoodworking @ 7:53 pm

IMG_7950 copy

If you are one of those people that seem to be good at everything the first time you try it?

You can go screw yourself!!!

No not really…

Well, maybe just a little.

Unlike the rest of us, you jerks, have some kind of natural ability, and it lets you adapt to new things much quicker than us mortals.

But, don’t take us too lightly, you superhuman weenies.

We have a little trick up our sleeves that in the long run, will even the playing field.

We will develop skill!

It won’t happen today, or tomorrow, but one day!

Yes!

ONE DAY!

Our hard earned skills will rival your freakish adaptive abilities, and perhaps even exceed them.

Yes one day you won’t be able to look down on us any more!

For we will be soaring far above you with wings of skill!

And we will hope that you never, ever practice to develop more skill of your own, or you will become better than us again.

And we will hate you once more.

02-mortice-chisel1.jpg

May 18, 2013

Handtool Economics Part 2

Filed under: Fair Woodworking & Hand Tool Blog,Favorites — fairwoodworking @ 12:18 pm

B&WebonyXSss3

I’ve got to hope that any regular reader of this blog already knows who made this plane. If you don’t, stop reading and click on the picture to discover one of the few blogs in the world that really matters.

I’ll wait…

OK, welcome back. Last time, I decisively convinced all of you that LN planes are not overpriced, so we can safely move forward. Way forward.

I’ve always wanted one of Konrad’s planes. I came close to ordering one a few years back, but the timing wasn’t right (and I’d just ‘accidentally’ dropped six bills on a set of chisels).

That was back when money seemed to grow on trees. Since then, the economy has left most of us a little lighter in the wallet, so new tools are a little slower to make their way into my shop.

Let’s face it, most hobbies seem to cost money. Unless you collect belly button lint, you are going to end up spending money on your hobby. Hand tools are no different, it won’t cost you as much as… Say yachting,  but I still need to eat.

These days, just like most of you out there, it’s not so easy to spare the funds required for this hobby.

Over the past decade or so, many fantastic tool makers have popped up. Some have flourished, and others have struggled under the weight of back-orders, others have flourished under the weight of back-orders.

I’m just another customer, and I don’t have ANY inside information on ANY tool makers, but if my change in buying habits are at all like the rest of the hand tool community, tool sales must be down.

The thing that bothers me is that not every retail market in our lives is suffering from the down turn in the economy. When I drive by my local coffee shop the line up of cars in the drive-through blocks traffic just as bad as when we all thought we were rich.

Over the past years, I’ve incorporated an adapted approach to finances vs. hobbies.

As an example, I can’t function (literally) without my morning coffee. It’s not a grumpy thing, it’s a drooling moron thing. There was a time that I was known by all the coffee shop staff well enough that my coffee and donuts were waiting for me at the till. I made a financial choice a number of years ago to make my morning coffee rather than buy it at the coffee shop (and skip the donuts). I’d forgotten what a savings this small thing makes, so do let’s have a look.

An extra-large coffee would cost me $2.00 each morning. Multiply that by 365 for a yearly cost of $730.00

A container of Folgers coffee lasts me at least a month. You can get it on sale for $7.00 so we stalk up. Multiply that by 12 for a yearly cost of $84.00

That one change of lifestyle saves me $646.00. I won’t include saving $417 in donuts I didn’t need. (Holly Crap!!! that would be a thousand dollars a year!!!)

You can walk out of LN with even their most expensive plane, or a full set of chisels (you didn’t want the chisel roll anyways) for less that $646.00.

I guess the problem here is that it would take years for this little scheme to pay for one of Konrad’s planes, and I really would like one of my own some day. That’s why I always make a lunch rather than eat out, get movies from my local library (Free) rather than pay $12.00 each at the Theaters, and a number of other things that I won’t get into.

Some people may say you shouldn’t have to sacrifice these things, and I’m not saying you should. It’s a question of likes vs. value.

I’d really like a jet ski, but I value woodworking more. I really liked skiing, but I valued woodworking more. Golfing is fun but I’d rather be woodworking.

I really dislike making my own lunch, and coffee, but I value our niche tool makers more.

If me not supporting my local coffee shop and fast food joint, keeps one small tool maker from closing up shop and going back to their desk job, I’ll gladly keep the home brew percolating, and the bread maker bread-maker-ing.

It’s no sacrifice.

So I challenge you to get out there and look for some tool maker that you like (that you really, really like), then consider if there is anything else in your life that you value less than that tool makers existence.

Let’s keep our hobby strong, because even in a recession, coffee still does grow on trees… or a bush… or something.

Next Page »

Create a free website or blog at WordPress.com.